Table Of Content

Join cedar strips end-to-end, always putting the joint over a mold and keeping the joints spread randomly over the surface of the canoe. Check the molds with a cedar strip, and shift them if needed, to be sure that all the strips will lie flat against each mold. Apply cloth and resin to the entire hull. Lay the dry cloth on the hull, and apply the resin with a paint roller. Lay fiberglass cloth over the hull so the weave is at an angle to the keel, then trim off the overhanging pieces.
oz Dry-Rubbed New York Strip
Sand the gunwales flush with a belt sander, removing the 1/4 in. Hold the sander as flat as possible while you sand. Mark the location of the screws that hold the inwales and decks to the hull so you can screw the outwales on without screws hitting each other.
Garlic Fried Rice
Spring clamps and slotted blocks help hold the strips in place where the molds are more curved. Between molds, short staples hold strips to each other. Align the molds using a string pulled taut from end mold to end mold, then tighten the bolts holding the molds to the supports. Place the molds on the strong back with the center lines of the molds and mold supports aligned, then bolt them in place. Snap a chalk line down the center of the strong back. This line will be used to align the mold supports and molds.
Historic Clintonville home for sale once served as Canoe Club HQ - Axios
Historic Clintonville home for sale once served as Canoe Club HQ.
Posted: Wed, 17 Jan 2024 08:00:00 GMT [source]
Attach the Ash Decks
Ancient Hawaiians cultivated taro, breadfruit, and sweet potatoes and discovered ingenious uses for fish, limu (edible underwater plants), and other bounties of the sea. European sailors and missionaries introduced cattle and livestock to the islands in 1778, in addition to disease-spreading fleas and viral infections. The basic idea behind a cedar-strip canoe is to make a hull of narrow wood strips, each one glued to the next with ordinary carpenter’s glue, and then cover the hull with fiber-glass, inside and out. The wooden hull by itself is weak, but the two layers of fiberglass make the canoe extremely strong, lightweight and waterproof. No ribs are needed, no canvas covering, and no caulking.
Join strips of ash for the inwales and outwales with a “scarf joint,” a low-angled lap joint. Attache the ash decks to the hull with stainless steel screws. Offset the two screws nearest the ends so they don’t interfere with each other.
Use a coping saw to trim the ends of the strips. Note how the ends of strips on opposite sides of the canoe overlap. Temporarily laying a strip on the other side will allow you to mark the strips for cutting. Bolt the mold supports to the strong back so the center lines match. The oversize holes leave you plenty of room for adjustment.
Clamp the Ash Inwale
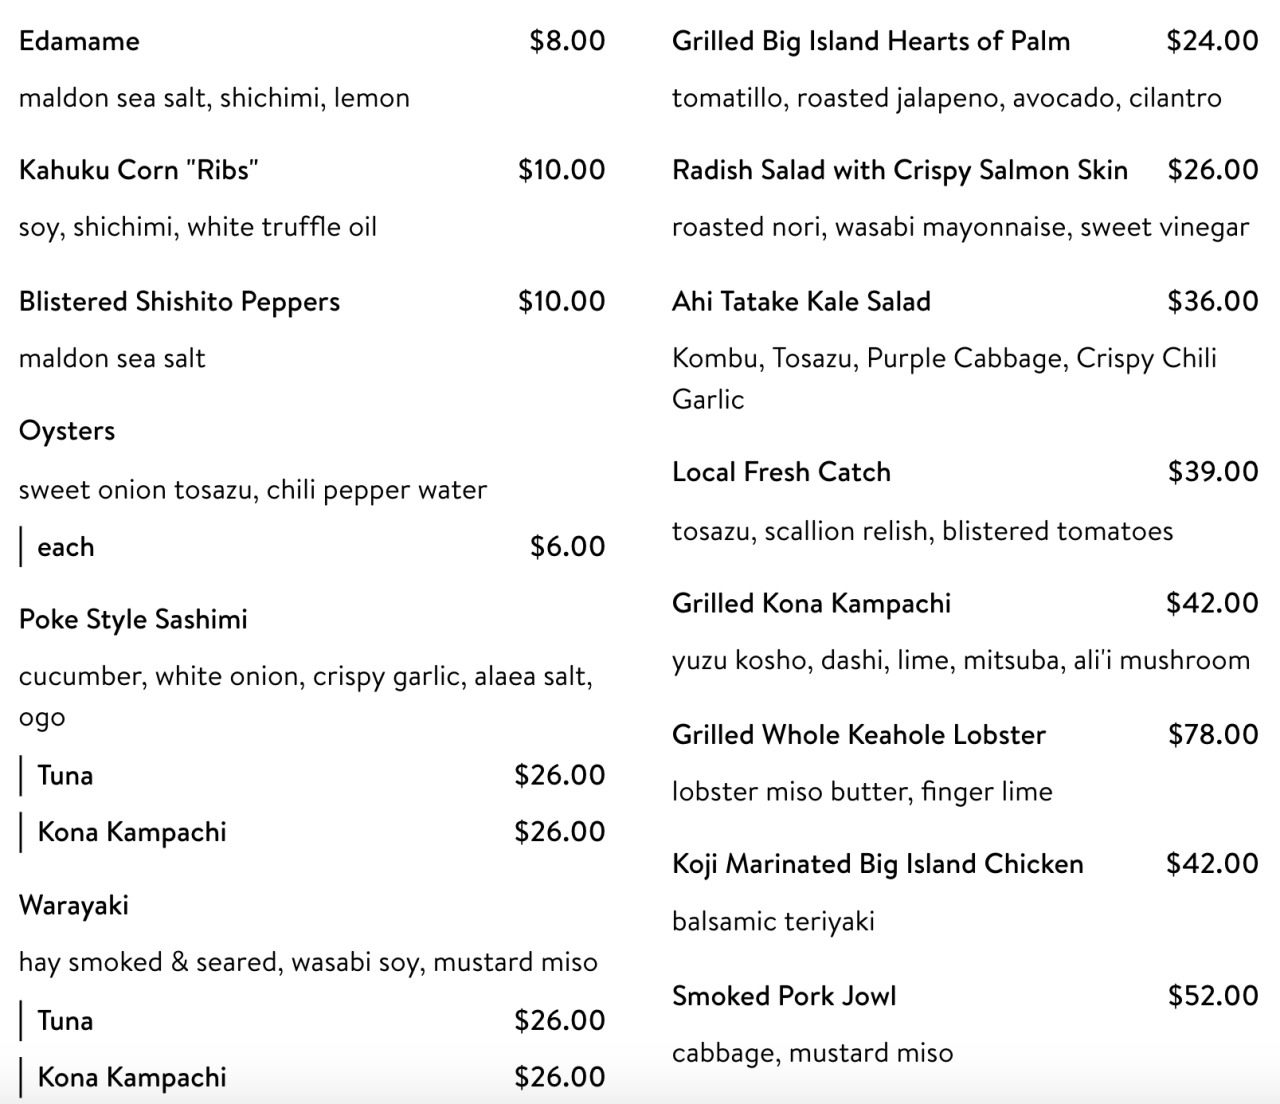
Align the poster board templates to the center lines on the plywood mold pieces. It’s fusion time at Malama Pono, an upscale Sherman Oaks restaurant where yuzu aguachile, garlic naan, seafood ricotta dumplings, and “Abuelita’s vegan ceviche” live side-by-side on the menu. The “Hapa” Style small plate is a lot of fun — two pieces of Spam crispy rice are mixed-and-matched with two pieces of tuna crispy rice. Today, nearly 40,000 Native Hawaiians call Los Angeles home (an impressive stat beaten only by Las Vegas, Hawai’i’s unofficial “ninth island”). From bowling alley diners to poke shacks, here are the 11 best Hawaiian restaurants in LA.
Transfer Mold Shapes
Trim the cloth an inch or so short of the ends of the canoe. Cut the cedar strips that will form the hull of the canoe out of ordinary cedar lumber. Start with the end strips, laying down the dry cloth, then applying resin with a disposable brush. These strips (two under and one over the main cloth layer) provide extra strength in this critical area. Scrap off the dry glue with a Surform file and paint scraper, then sand the hull smooth with a power sander and coarse sandpaper.
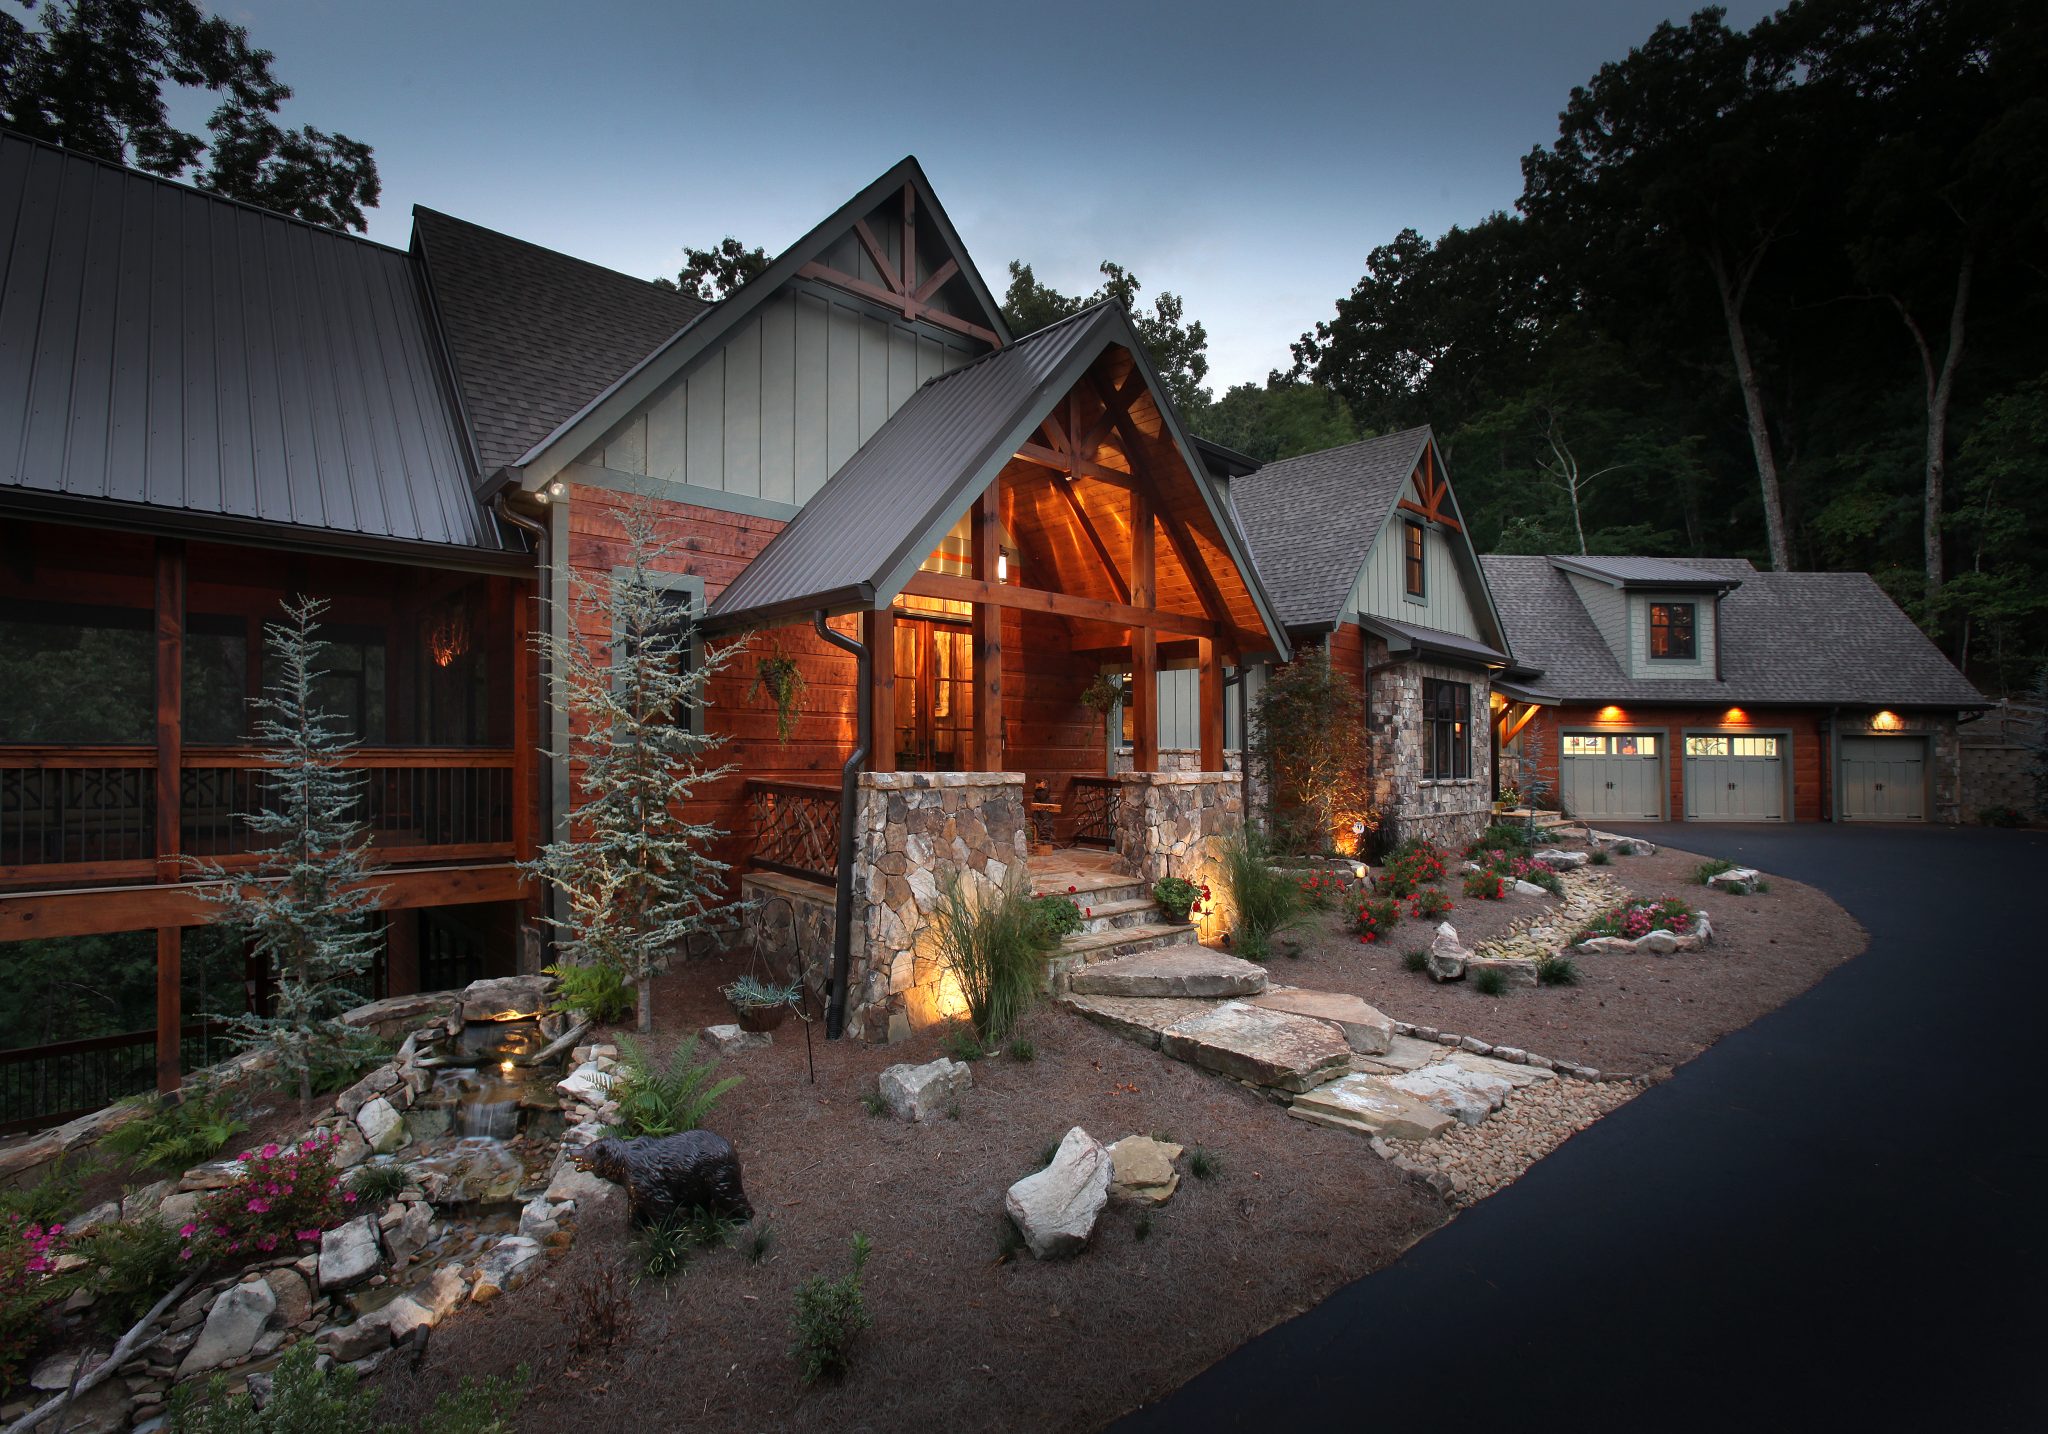
Look below at some of the unique ways Canoe Custom Homes has flawlessly integrated nature into the home. Your kitchen is one of the most important aspects of your house and with Canoe Custom Homes it can also be the most beautiful. Onion grilled cheese sandwich with a twist. If a taste of Hawaii is what you’re seeking then we have just the thing for you at this Hawaiian-themed restaurant in SoCal that will transport you straight to the islands. Here’s a look at what you can expect when you visit Canoe House in Southern California. We all know that Southern California is pretty much as close to paradise as it gets.
Apply two coats of clear exterior polyurethane to the hull and to all the ash trim. Then break out the paddles-you’re finished! Next, learn secrets of Amish furniture makers.
Trace the shape of each mold to a separate sheet of tracing paper, taping it securely to the plywood layout board for accuracy. Transfer the mold shapes from our drawing to a piece of plywood using brads and a thin piece of poster board. Want to gift a tour or boat rental to a friend or loved one? Check out our Venice Canals Boat Rental Gift Certificate or Venice Canals Boat Tour Gift Certificate. Book an hour or two on your own to explore the canals. Share a moment with the a loved one amongst the ducks.
But, even when you live in a place this beautiful, it’s still possible to crave a dose of island life in a tropical paradise every now and again.
Whether you book a guided tour, boat rental or photography session, you’ll get to enjoy a hidden gem in Los Angeles. Cut strips from the scraps to cover the ends of the canoe. Cut them at 45 degrees to the weave (on the bias) and make the ends pointed. Served with steamed rice and black beans or a cup of chilled gazpacho. Fill the ends with polyester resin putty, using a rounded end stick to smooth it. Putty strengthens the ends and makes them easier to clean.
Strips are edge-glued with regular carpenter’s glue and stapled to the molds to hold them in place. Short strips are cut later to fill the triangular gaps. Cut the keep strip to fit after all the horizontal strips are glued together. Staple the keel strip to the molds so it’s exactly centered.
Screw the inhale to the hull, then trim the other end. Shape the ends of the canoe with a rasp so the edge is about the diameter of a pencil. Sand the entire hull smooth, then coat it with a polyurethane sanding sealer. Pull the staples out when all the strips are in place and glue is dry. A bottle opener with the tip ground or filed flat is the perfect cool.
Wood braces with nails at the ends keep the hull from bowing in when you’re not working on it. Use the molds to determine the nail spacing. Remove the canoe from the strong back and place it on sling stands, which support it while you work on the inside of the hull and the trim. Fill in the bottom of the canoe, working from the keel strip outward. A hand plane quickly cuts the tapered ends of the strips. Long, straight pieces of wood clamped to the end molds will allow you to do it accurately by eye.